May 29, 2024
How to Apply a CGM Sensor
It’s no secret that continuous glucose monitors (CGMs) are popular among people with diabetes these days. If you’re wondering, “how is CGM inserted?,” keep reading for a complete guide to CGM installation and more.
Share This Story

It’s no secret that continuous glucose monitors (CGMs) are popular among people with diabetes these days. If you’re wondering, “how is CGM inserted?,” keep reading for a complete guide to CGM insertion and more.
![]()
Written by: US MED Staff
Clinically Reviewed by: Shirley DeLeon, RD, CDCES
Continuous glucose monitors (CGMs) have become increasingly popular among people with diabetes due to their unmatched convenience. These devices allow you to test your glucose levels quickly and efficiently, providing faster results than traditional glucose meters. CGMs are especially useful for regular monitoring, though you may still need to use a traditional meter if your symptoms don’t match your glucose readings or to confirm high or low levels.
That said, you won’t be able to use these devices properly if you don’t know how to apply their sensors correctly. If you’re wondering, “how is CGM inserted?,” you’re not alone. Keep reading for a complete guide to continuous glucose monitor installation and more.
Table of Contents
What is a continuous glucose monitor?
The term “continuous glucose monitor” might sound technical, but these devices aren’t that complicated. Essentially, these monitors give you regular updates on your glucose levels, which can help you reduce (but not eliminate) your use of fingerprick tests.
Why are they used for people with diabetes?
Living with diabetes can be difficult for all sorts of reasons – including fingerprick testing. While these tests may seem like a relatively minor annoyance, there’s no denying that they can take valuable time out of your everyday life. Meanwhile, many people with diabetes have trouble dealing with the pain associated with fingerprick tests.
CGM systems can’t cut fingerprick tests out of your life completely, but they can make them a far less common part of your diabetes management routine. On top of that, you’ll get much more information from a CGM than you would from “normal” glucose meters, potentially improving your diabetes management efforts.
How does a CGM work?
All CGM types are built around a sensor, which is worn on a specific part of your body. The sensor records your glucose levels throughout the day, but it doesn’t do that by analyzing your blood. What it looks at instead is your interstitial fluid – that is, how much sugar is in the fluid surrounding your body’s cells. Finally, the information from the sensor is transmitted (Via a transmitter) to a smartphone or a standalone reader or receiver.
How to insert a continuous glucose monitor
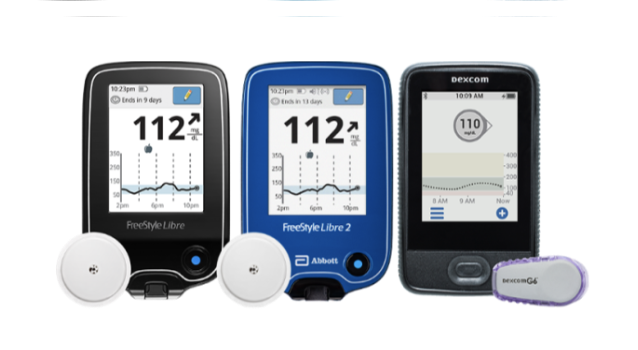
The specific continuous glucose monitor insertion method you’ll follow depends on the brand of CGM you use. Here are the sensor application methods for US MED’s top CGM systems:
Dexcom G6
Before applying your Dexcom G6 CGM System sensor, wash and dry your hands and ensure your sensor and transmitter have not passed the “use by” date. Then, choose a site to insert your sensor. If you are between the ages of two and 17, use a site on the lower back or upper buttocks; if you are 18 or older, use the abdomen only. Make sure your site of choice is at least three inches from injection sites or your insulin pump infusion set and 2 inches away from your belly button. Avoid bony areas (like ribs and hips) and areas with scars, hair, tattoos, or irritation; along with that, don’t use the same sensor site twice in a row. Rotating the site each time is important to avoid scar tissue formation.
After you’ve picked a site, clean it with rubbing alcohol and let it dry. Remove sensor applicator paper tabs without touching the adhesive, put the applicator on your skin (horizontally) and fold and break off the safety guard. Then, press the applicator button to insert the sensor. Once that’s done, remove and dispose of the applicator – your sensor should be in place.
Finally, it’s time to focus on attaching the reusable transmitter. Clean your transmitter off with an alcohol wipe and let it dry. When it’s dry, insert the transmitter’s tab into the matching slot on your sensor, snapping it into place (insert the smaller end first and then click the wider end into place). Then, rub around the entire adhesive three times to keep it secure. Once the transmitter is in place, do not remove it until it’s time to replace the sensor. After selecting “start sensor,” first the device must pair and then there is a two-hour warm-up period.
Dexcom G7
The Dexcom G7 CGM System has some notable changes and improvements in comparison to the Dexcom G6, including an all-in-one sensor and transmitter. While the sensor application process the Dexcom G7 is broadly similar to the method used for the Dexcom G6, there are a few changes worth mentioning.
First of all, you’ll need to follow a different process for choosing a sensor application site with this system. Dexcom G7 users between the ages of 24 months and six years can wear their sensors on the upper buttocks, while people with diabetes aged two or older should wear sensors on the back of the upper arm.
Since Dexcom G7 sensors have built-in transmitters, you won’t need to worry about attaching the transmitter once your sensor has been secured. However, you should use the overpatch included with this sensor – and to do that, you’ll need to follow yet another set of site preparation instructions. For more information on that process, refer to Dexcom’s official website.
FreeStyle Libre 2 system
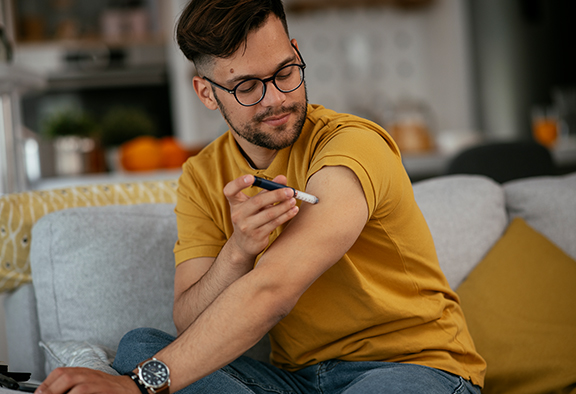
Unlike the Dexcom G6, the FreeStyle Libre 2 system is designed for use on the back of your upper arm. Following the previously explained site selection instructions, choose a site on this part of your body. Once you have, clean it with an alcohol wipe and let it dry.
The sensor kits used in the FreeStyle Libre 2 system consist of two parts: the Sensor Pack and the Sensor Applicator. When you’re ready to install the sensor, take the lid all the way off your Sensor Pack and unscrew the cap from your Sensor Applicator. Press the Sensor Applicator into the Sensor Pack by lining up the lines. You will hear a loud click. Separate the two and keep the sensor applicator in your hand.
When that’s done, place the Sensor Applicator over the site you cleaned with the alcohol wipe earlier. Push down firmly until the sensor is in place; then, you will hear a click and double-check that it is secure before activating the sensor from your reader. There will be a one-hour warm-up period. Finally, dispose of the Sensor Pack and Sensor Applicator.
FreeStyle Libre 2 Plus sensor
As an enhanced version of the sensor found in the FreeStyle Libre 2 system, the FreeStyle Libre 2 Plus sensor offers new benefits like Tandem® t:slim X2® compatibility and a 15-day lifespan. Since this product is an updated version of the sensor found in the FreeStyle Libre 2 system, the process of applying one of these sensors is effectively identical to the application process for its predecessor.
If you are using this sensor along with an Automated Insulin Delivery system, do not activate it with your FreeStyle Libre 2 reader or app. Instead, follow the activation instructions offered by your insulin pump manufacturer.
FreeStyle Libre 3 system
The site selection and preparation process for FreeStyle Libre 3 system sensors closely resembles the process used in other FreeStyle Libre systems. But unlike the two-part sensor kits used in the FreeStyle Libre 2 system, FreeStyle Libre 3 sensors use a refined Sensor Applicator. As a result, people using the FreeStyle Libre 3 system can simply lift their Sensor Applicator out of its pack. From there, you can apply your sensor by:
- Placing your Sensor Applicator over the application site
- Pressing down firmly and holding it in place for a few seconds
- Gently pulling the Sensor Applicator away
- Ensuring the sensor is secure by pushing down on it and running your finger along its adhesive
Are CGMs covered by insurance and Medicare?
No matter who handles your insurance, you shouldn’t need to worry about CGM coverage. Both Medicare and the majority of private insurers cover these devices. In fact, most Medicare coverage has no out-of-pocket costs. Make sure to give US MED a call to learn about your coverage, and remember, you’ll need a prescription to order your CGM device.
How to see the glucose reading
Each continuous glucose monitor brand displays glucose numbers in a slightly different way. Depending on the CGM system you use, this could involve scanning your sensor with your phone or reader or getting automatic updates on your display device.
What do the glucose numbers mean for people with diabetes?
Type 1
Working alongside your diabetes healthcare team when determining your ideal glucose levels is crucial. However, these numbers are common goals for people with type 1 diabetes:
- 80-130 (before meals)
- Under 180 (two hours after a meal)
Type 2
These numbers can also apply to people with type 2 diabetes, but it’s still essential to collaborate with your healthcare team to determine your precise goals.
Why choose US MED for your CGM needs?
At this point, you can confidently answer the question, “How is CGM applied?”. Along with that, we hope we’ve given you an understanding of how to install a continuous glucose monitor sensor across leading CGM brands. But while choosing the right CGM for your life is essential, picking the right diabetes supply company is just as important. That’s because you’ll need to get more sensors (and many other diabetes products) on a regular basis.
US MED is well-known for its ability to reliably deliver top-notch diabetes supplies to people with diabetes across America. But we aren’t just notable for our direct insurance billing and free priority shipping. We’ve also been recognized by the ACHC, URAC, and NABP, and we have an “A+” rating from the Better Business Bureau. Most importantly of all, we’ve delivered diabetes supplies to more than a million happy customers. If you’d like to join them, explore our selection of products today!
Frequently Asked Questions
Where is the best place to apply CGM?
While several CGM sensors are often worn on the back of the upper arm, ideal application sites vary across different CGM types and age ranges. For optimal results, follow the instructions provided by your CGM device’s manufacturer.
How is a CGM inserted?
The application processes for many CGM systems are roughly similar, but it’s essential to ensure you’re following the right steps for your system. With that in mind, make a point of referring to the official sensor insertion instructions included with your CGM system.
Does CGM have a needle?
CGM systems use a needle as part of the sensor application process. That needle retracts into the applicator once the sensor gets inserted , but a small filament (sensor) will stay under the skin to measure glucose levels after that point.
Should CGM be on arm or stomach?
Many CGM systems encourage placement of the sensors in the back of the upper arm – but there are exceptions. As always, be sure to refer to manufacturer instructions for sensor application.
Can you shower while wearing a CGM?
Many modern CGM sensors are considered “water-resistant.” If your sensor falls into this category, you are able to shower and swim while wearing your CGM system.
Can I lay on my CGM?
If your sensor happens to fall off while sleeping, you will need to reapply a new one.


